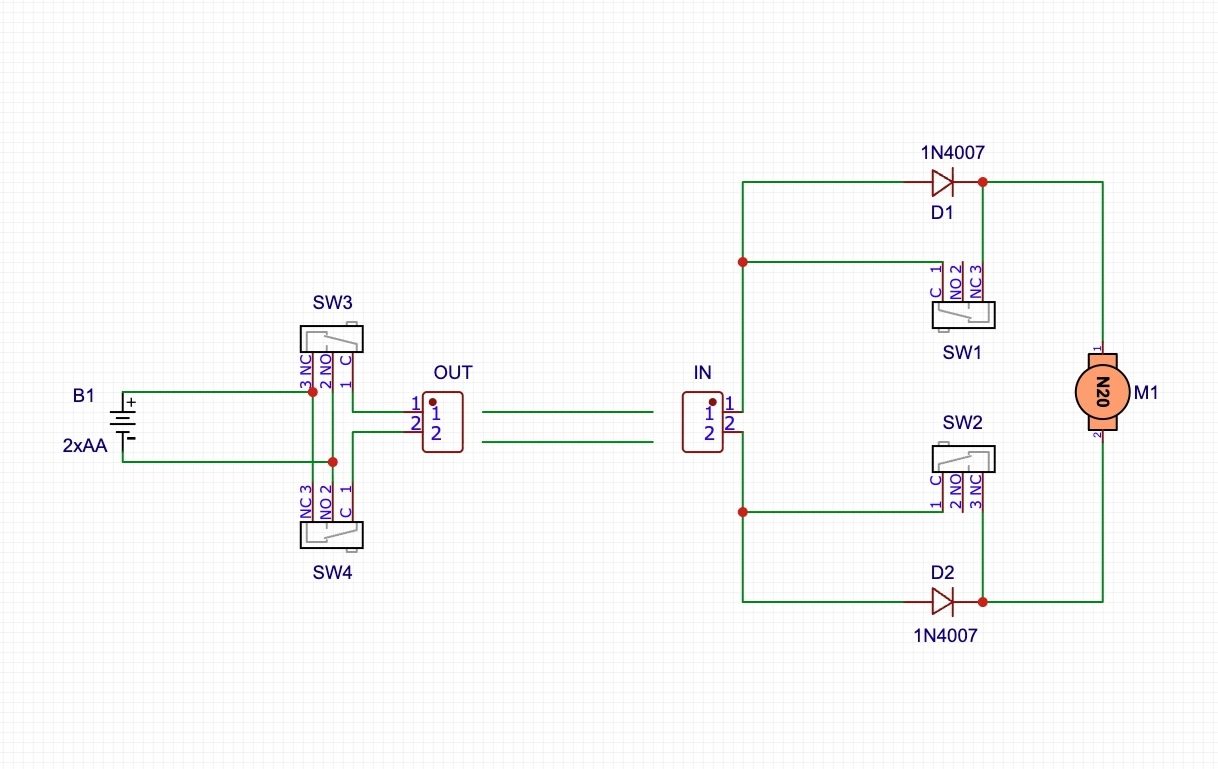
The control panel is a simple modular circuit that contains a battery holder for two AA pencil batteries, a main switch, and several switch modules. The first module is connected to battery power through the switch, and subsequent modules are connected in parallel. Each module contains two microswitches and an output connector (terminal). The controller switches one or the other microswitch, changing the polarity of the output voltage.
3D Printing
These three parts form the complete enclosure, choose an appropriate material color:
boxtop.stl
boxbottom.stl
bat_cover.stl
These parts are not visible, any material and color may be used:
BatteryHolders.stl
N times arm.stl [Fig. slicer]
N times spring.stl
Material: PLA, PETG, or other Layer thickness: 0.2 mm Support: Support on build plate only The spring should be printed from a more flexible material, e.g. PETG:
Each control lever should be in a different color. I recommend printing together with the turnout switch blades.
N times knob.stl
Switch Module Assembly
Solder the microswitches to the top side. The open end of the lever should point outward. Solder the terminal.
Battery Holder Assembly
Insert contact springs and tabs into the battery holder. The tab is always next to a spring and opposite to a spring. Two identical contacts are never next to each other. On the bottom side, bend the tabs at right angles. Connect them with a wire on one side, and solder two insulated wires on the other side. Break one wire and solder a switch there through the center and one end terminal of the switch.
Assembly
First assemble the control lever, arm and spring. Screw them together. Assemble all channels.
Screw the module PCBs, each with one screw, to the top panel. Connect them with short wires. Finally, solder the power supply with the switch. Melt an M3 screw into the bottom cover. This can be done with a soldering iron. Insert the switch in its place, hold the battery holder in its hole in the bottom cover and connect the top and bottom covers. You don't need to screw in all screws, corner screws and every second module screw are sufficient. Insert batteries and screw the battery cover with an M3 screw.